A Christmas countdown sign that runs all year
I’ve always wanted a sign that counts down to Christmas. Not an app I have to open, and not just in December: a sign that sits there all year and tells me how many days are left. Partly I just wanted one, and partly I wanted to see if I could build it.
It took two versions. The first was a web page on a screen. The second is a standalone LED sign that sits on a shelf with no computer behind it. Both are below: the web version is a free download, and the LED sign’s code and guide are the kit.
What you’ll end up with
The LED sign:
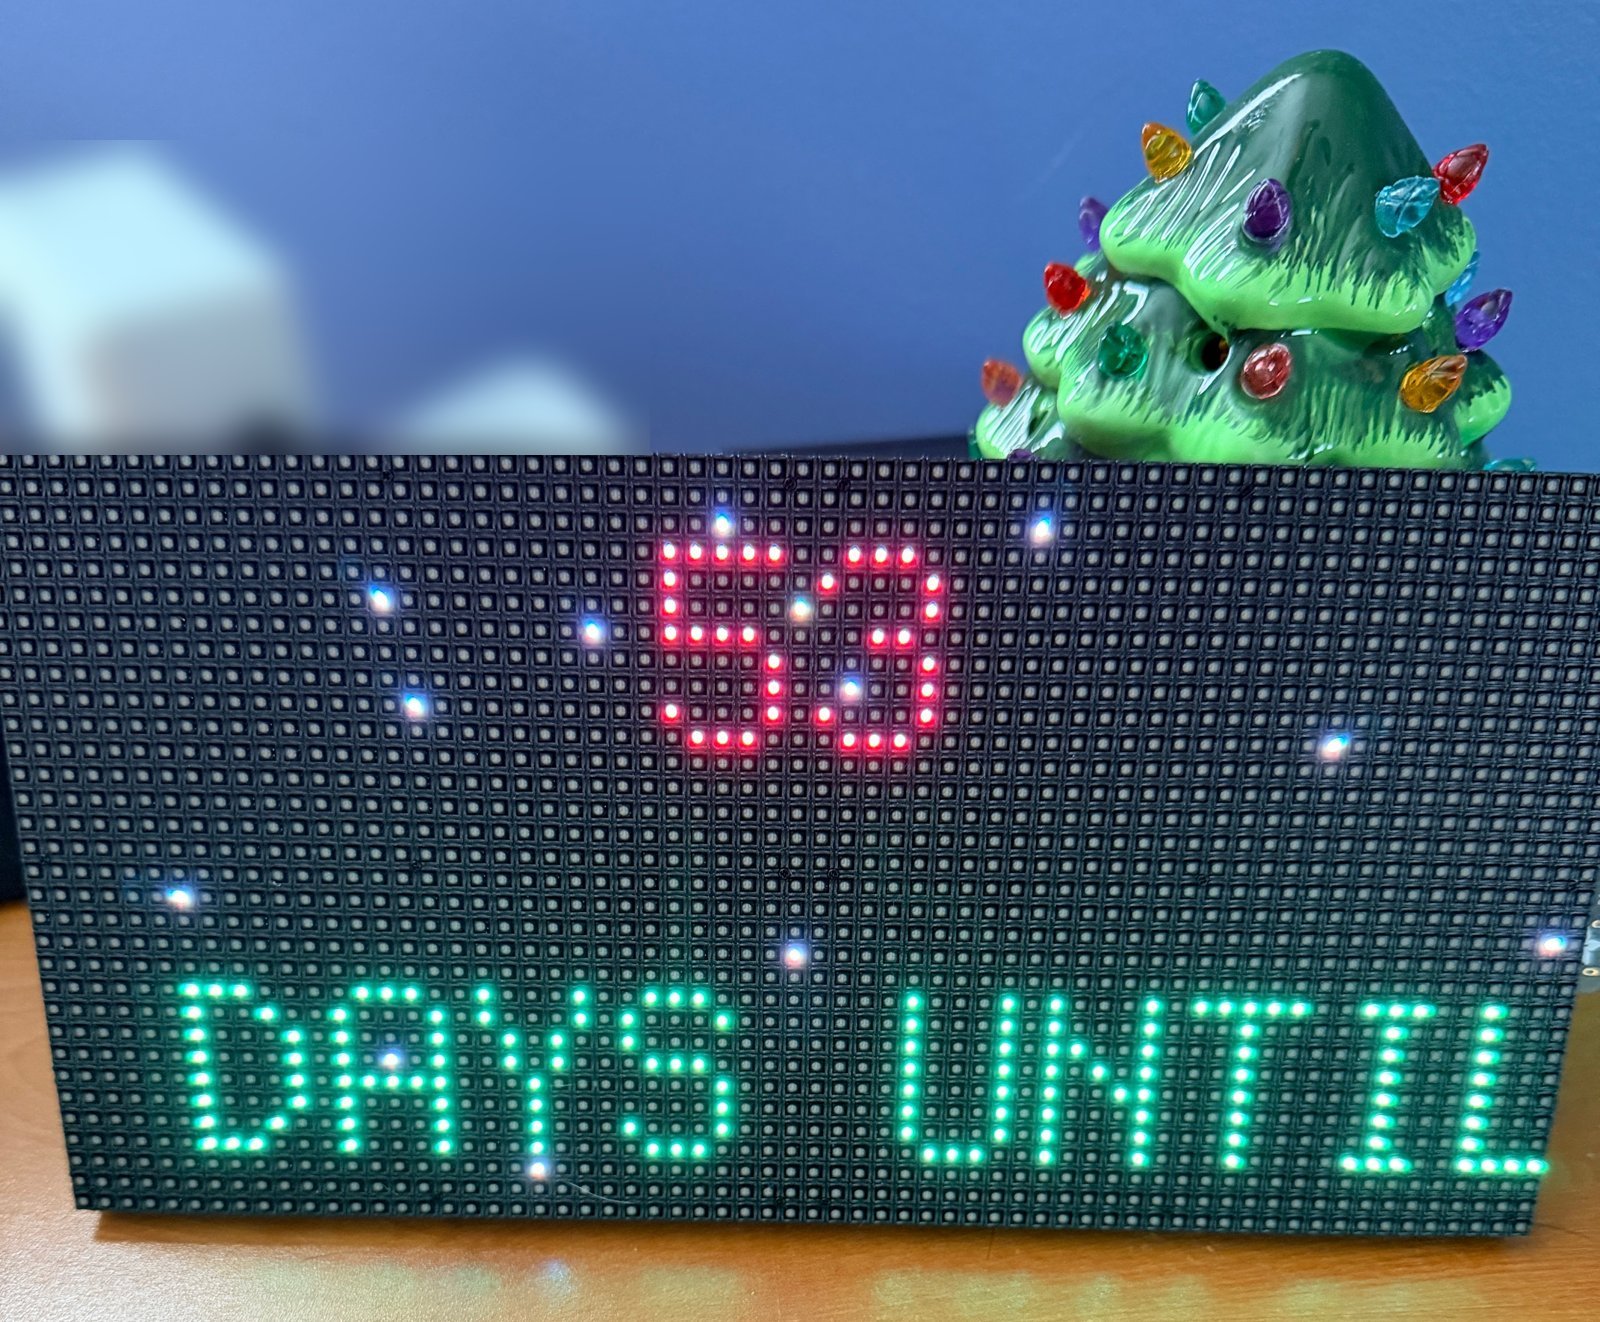
- A bright 64×32 LED panel showing the days until Christmas in red, with “DAYS UNTIL CHRISTMAS!” scrolling underneath in green.
- Falling snow drifting down behind the text, in white, pale blue and a little gold.
- On December 25, it switches to a scrolling “MERRY CHRISTMAS!” for the whole day. On the 26th it starts counting to next year by itself.
- No computer needed: a small board plugs straight onto the back of the panel, gets the time over Wi-Fi, and keeps its own time in between.
The web version (free):
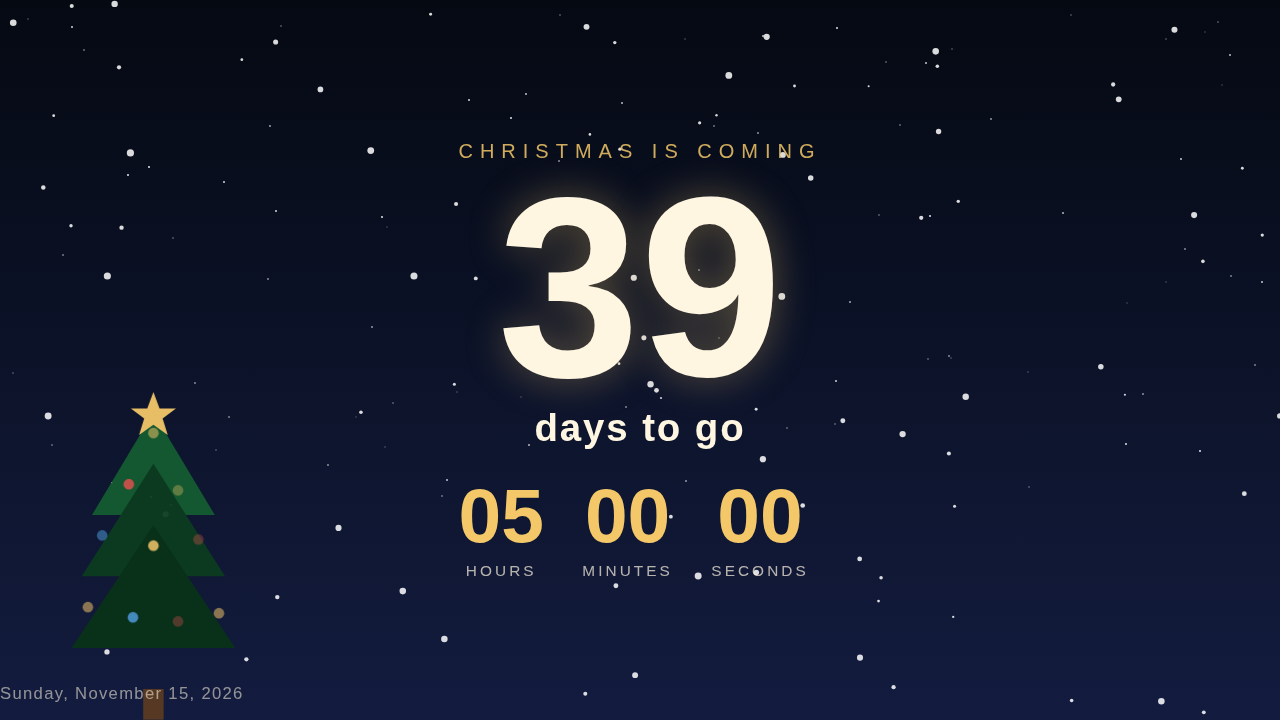
- A full-screen countdown with days, hours, minutes and seconds, falling snow and a twinkling tree.
- One file that works in any browser, with no internet needed.
What you need
For the web version: any device with a browser. An old laptop, a tablet or a spare monitor on a small PC all work.
For the LED sign:
| Part | What I used | Approximate price |
|---|---|---|
| Adafruit Matrix Portal M4 (product 4745) | The board: it plugs onto the back of the panel and has Wi-Fi | $25 |
| Adafruit 64×32 RGB LED matrix, 4 mm pitch (product 2278) | The panel. It must be this size and type (see “Where I broke it”) | $40 |
| A USB-C power supply, 5 V 3 A | Powers the board through its USB-C port, and the board powers the panel through the power cable that comes with the panel (it screws onto the board). A good phone or Raspberry Pi charger works. I did it differently: a generic 5 V supply from Amazon with a barrel splitter and a barrel-to-USB adapter, so one supply feeds both | $10 |
| A USB-C data cable | To copy the code onto the board (some charging cables carry power only) | (probably in a drawer) |
| A free Adafruit IO account | The sign uses it to get the time | $0 |
Prices are approximate, checked on adafruit.com on November 2, 2026; the power supply is a typical price. Don’t skimp on the supply: Adafruit says the panel can draw up to 4 A with every LED fully on, though this design lights only a small fraction of them.
The kit (the code and the step-by-step guide) is coming soon. If you want this for this Christmas, check that it’s available before you order the parts.
Steps
The web version (free)
- Download the web version and unzip it.
- Double-click
index.html. It opens in your browser and starts counting. - Press F11 (or your browser’s full-screen option) to fill the screen, and turn off the screen’s sleep setting if you want it on all the time.
It only needs the device’s clock and time zone to be right. The included README also shows how to serve it from a home server with Docker, so any screen in the house can show it.
The LED sign (overview)
- Put CircuitPython on the board. CircuitPython is a version of Python for small boards. You download one file from circuitpython.org and drag it onto the board when it shows up as a drive.
- Copy the library files onto the board’s
libfolder. This sign needs about a dozen of them. - Copy the sign’s code and a settings file with your Wi-Fi name and password, your time zone, and your Adafruit IO username and key.
- Plug the board onto the back of the panel and connect power.
On power-up it connects to Wi-Fi, gets the time and starts counting. The kit has the code from my sign, the full library list, the settings file and a step-by-step guide.
Where I broke it
I should be clear about who did what. Claude, the AI assistant I build with, wrote every line of code and worked out what was wrong each time something broke. I did the hardware: buying the parts, putting it together, copying files onto the board, and testing every change on the real sign, then reporting back with error messages, photos and videos. It was a tight loop: Claude would send a fix, I’d try it on the sign within minutes, and the next fix would follow.
I bought the wrong panel
My first panel was a generic one: 80×40 pixels, with what’s called a 1/20 scan rate. It looked like the right kind of thing. The board crashed with a “hard fault” the moment the code tried to start the display, even with no panel plugged in at all, which ruled out a wiring or power problem.
Claude had me run a tiny test script to narrow it down to that one line, then try the same call by hand in the board’s console, which finally gave a readable error: the board’s display driver needs a panel height that its address lines can describe exactly, and 40 isn’t one of them. Some research turned up the same unsolved problem with this panel type in a popular Arduino library too. It wasn’t a coding mistake; this panel and this board simply don’t work together.
The fix was a new panel: Adafruit’s own 64×32, 1/16-scan panel, the one the board is designed for. If you build this, buy exactly that panel. “P4”, “RGB matrix” and “HUB75” in a listing aren’t enough.
Which way does the connector go?
The board plugs straight onto the panel’s connector, but the connector isn’t keyed, so it fits either way. Two things made this a non-issue: that connector only carries signals (the panel’s power comes in separately), so plugging it in backwards can’t damage anything, and the board screws onto the panel with two standoffs that only line up the right way round.
A pile of missing library files
The code uses a dozen small libraries, and each missing one only shows up as an error when the code reaches it. I hit four of these, one after another: adafruit_ticks, adafruit_bitmap_font, then two more networking libraries. Each fix was one more file in the lib folder. The kit’s guide has the complete list, so you can copy them all at once.
Getting the time needed an account
The board gets the time through Adafruit’s own time service, which needs a free Adafruit IO account. Without one, it failed with “that username does not exist”. The fix was a free account, plus its username and key in the settings file.
The text didn’t fit
The first working version showed the number overlapping the “DAYS TO GO” caption. The built-in font is taller than expected, and on a screen only 32 pixels high, that matters. The fix was pinning the number to the top and the caption to the bottom.
The design took a few rounds
I wanted it to feel like the web version without being cluttered. First came some twinkling sparkles in the margins, then real falling snow behind the text, then a scrolling caption instead of static text. Then I asked for bigger numbers and smaller letters, which led to a design that alternated between the number and the caption. I didn’t like it, so it went back to showing both at once, just with a slower scroll.
It’s been running fine since
The sign has run without problems since it was finished, and it comes back by itself after a power cut. One thing to know: when it powers up, it waits until it can reach Wi-Fi and get the time before it shows anything, so if the power and the Wi-Fi both go out, it stays dark until the Wi-Fi is back. Once running, it keeps its own time and only checks in every six hours, so a Wi-Fi drop later doesn’t bother it.
A bug in the web version, found while writing this
While testing the web version for this article, Claude found a real bug in it. The page counted real elapsed time to Christmas, which goes wrong when the clocks change between now and Christmas. In the US, from March until the clocks go back in November, the page showed one day too many between midnight and 1 AM every night (other countries got the same kind of glitch on their own dates). The download has the fix: it now counts by the calendar. Claude also made it work on older tablets, which couldn’t show the hours, minutes and seconds.
Want the full version?
The web version is free above. The kit is for the LED sign:
- The code from my sign, and the complete list of library files to copy.
- A settings file to fill in with your Wi-Fi and Adafruit IO details.
- A parts list with exact product numbers, and a clear warning about the look-alike panels that won’t work.
- A step-by-step guide (PDF too), from installing CircuitPython to plugging it together, plus a printable checklist.
Related
Want it ready to go? Christmas Countdown LED Sign Kit
The code from my sign, the library list, a parts list and a step-by-step guide for a standalone LED sign that counts down to Christmas all year.
$6
Coming soon